This post is dedicated in part to Ms. Jennifer Grant.
A few weeks ago I found a 15 minute “water cracker” recipe that gave me exuberant chills I just had to make them. One thing stopped me, the camera I use at the time was in Cebu City accompanying my cousin in an International Dance Convention. So I had to keep my jittery self from exploding in excitement as I await her return, I mean the camera. Finally after 8 agonizing days she did. However, I still didn’t make the crackers, why? My attention was momentarily shifted into the fact that in a few weeks I’d be leaving (moving away from home to a destination unknown and what I call “future awaits”) and I was in a panic mode. What should I do? What should I do? What should I do? That time the crackers had to lay low and knows better than bother me with their exquisite simplicity. After about a day…
Then I said, “Ah, screw panic. I want the crackers now.” So I made them. I followed Jennifer’s recipe at first then made my own variation.
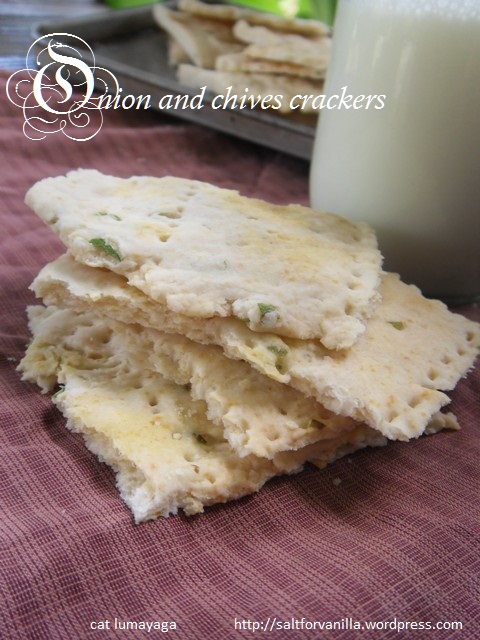
Here’s my “water cracker” onion and chives version.
1 cup flour
½ tsp baking powder
¼ tsp salt
¼ cup warm water
2 ½ tbsp vegetable oil
2 tbsp finely chopped onion and chives
I have emphasize that I am using an oven toaster here. That old (I’m sure the toaster has been a part of my life since I was about 8 or 10 years old) red BUT ultimately reliable oven toaster and I are friends. I know its quirks, temper and moods. He knows I rely on him too much. Pardon me for making him some sort of “third person”, he’s sensitive. (Actually, I just realized he’s close to his death. Parts of his body is failing him. I mean, falling off him.)
Ok back to the crackers. So I pre heated the oven toaster for about 3 minutes. I have already removed the sturdy sheet pan.
Procedure:
1. Mix the dry ingredients first. Use a bamboo whisk (or any whisk you might have).
2. Add in the wet ingredients including the onion and chives. I’ll be honest, I sort of eyeballed the wet ingredients at first, the measurements I gave you are approximates so I suggest to have extra flour in hand in case the dough’s too dry or flaky.
3. The dough must resemble that of a freshly kneaded doughnut roll. It will form a nice ball off shiny dough that holds itself together.
4. Flatten into the lightly greased sheet pan. Use your fingers and flatten into 1/3 cm thickness. Cut before baking. Or make a simple dotted pattern like I did.
5. Bake for 5 minutes. Let cool. The crackers will be soft to the touch but will harden as it cools. Enjoy.
Normally, as Jennifer stipulated it’s supposed to take only at least 15 minutes. This took me almost an hour. I made it as leisurely as I can. Doing things that are absolutely unnecessary like washing my hands every time bits of dough or a speck of water or oil find their way into my fingers.

So how did it taste? Lovely! It was delicious. I often marvelled at how those “slimming” crackers in flimsy plastic wrappers are made and now I have an alternative. Personalized even.
Thank you Jennifer Grant.
As promised, here are my photos!


06/05/2012 at 8:06 pmThanks for commenting on my blog, so that I could “find” YOUR blog. I love it. This cracker recipe will be used a lot. I love simple crackers and have never made them. And you did them in a toaster oven, I’m impressed. Nice photos, too.
06/05/2012 at 8:09 pmThat’s the idea. And it helps me get recipe ideas as well, works both ways, yes? 😀
09/05/2012 at 2:21 pmLooks very yummy and good luck for your new future!
10/05/2012 at 7:22 amThank you, ate Jenny.
10/05/2012 at 7:23 amHaha walang anuman
You are great cook..
My talent ka
Jenny